

Disclaimer: This information is provided as-is for the benefit of the Community. Please contact Sophos Professional Services if you require assistance with your specific environment.
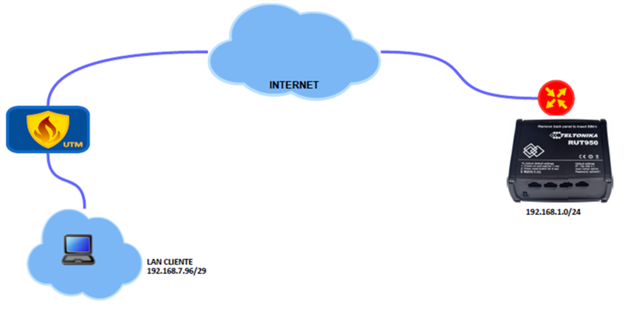
Table of Contents
Configuring Sophos Firewall
- Add local and remote LAN
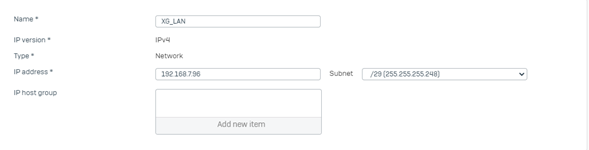
- Go to Hosts and Services > IP Host and select Add to create the local LAN.
- Go to Hosts and Services > IP Host and select Add to create the remote LAN.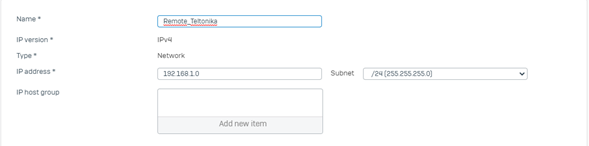
-
Create an IPsec VPN connection
- Go to Configure > Site-to-site VPN > IPsec > IPsec profiles and select Add to create the policy.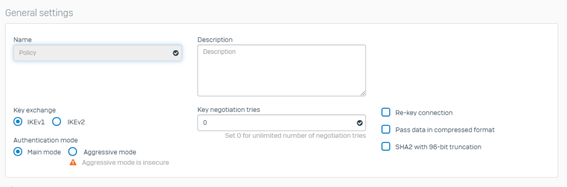
- Dead Peer Detection: Disabled

Create site-to-site Connection
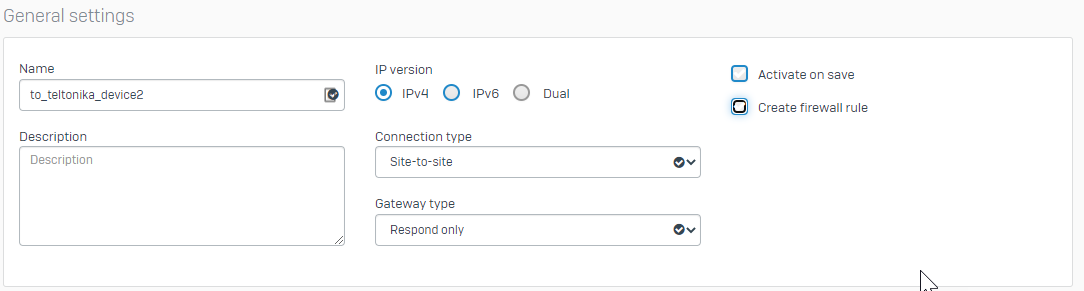
- Go to Configure > site-to-site VPN > IPsec > IPsec Connections and select Add to create a new VPN.
- Enter a Name: to_teltonika_device2
- Select IP versión: IPv4
Connection type: Site-to-site
Gateway type: Respond only
...
- Encryption
- Select your Profile: Policy
Authentication type: Preshared key
Enter a pre-shared key

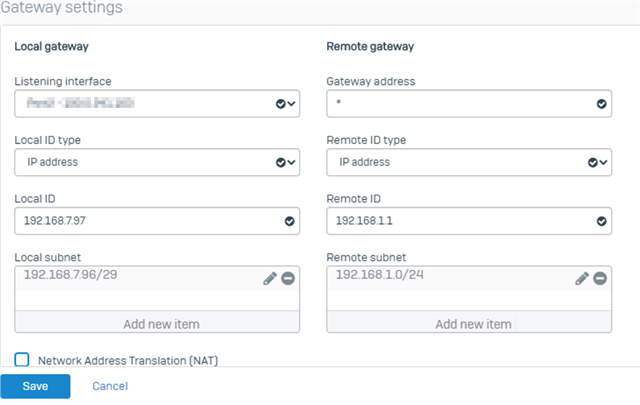
- Global Settings
- Listening interface: select your WAN port
- Remote Gateway: Enter the Public IP of the Teltonik router or a * if the device is behind another Firewall
- Local ID type: IP Address
- Remote ID type: IP Address
- Local ID: set your local ID (an IP)
- Remote ID: set the router's ID (on router's interface - My identifier) (IP)
Configuring Router Teltonika RUT2XX
-
Creating an IPsec instance
Log in to router’s Web UI, go to Services -> VPN -> IPsec
Enter any name for the instance and hit ‘Add’
Click Edit on the newly created instance.
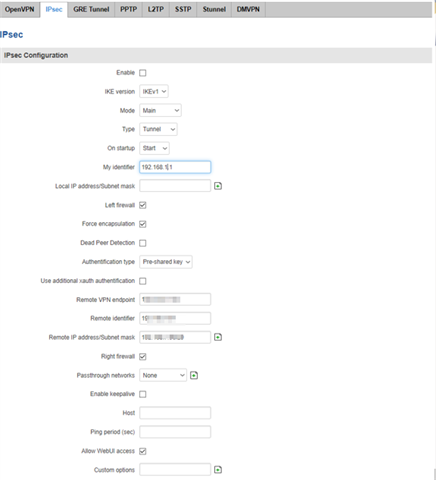
Enable Checkbox: Enabled
IKE version: IKEv1
Mode: Main
Type: Tunnel
On Startup: Start
My identifier: 192.168.1.1 (ROUTER LAN GATEWAY)
Local IP address/Subnet mask: LAN IP address and prefix (for ex. 192.168.1.0/24)
Left firewall: Enabled
Force encapsulation1: Enabled
Dead Peer Detection: Disabled
Remote VPN endpoint: 190.0.241.163
Remote identifier: 192.168.7.97 (REMOTE LAN ADDRESS)
Remote IP address/Subnet mask: 192.168.7.96/29 (Remote IP Subnet)
Right firewall: Enabled
Passthrough networks: NONE
Enable keepalive: Disabled
Host: EMPTY
Ping period (sec)
Allow WebUI access: Enabled
Custom options: EMPTY
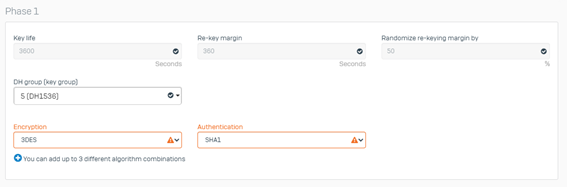
- Phase 1:
Encryption algorithm: 3DES
Authentication: SHA1
DH group: MODP1536
Lifetime (h): 3600 (seconds)
Testing the connection
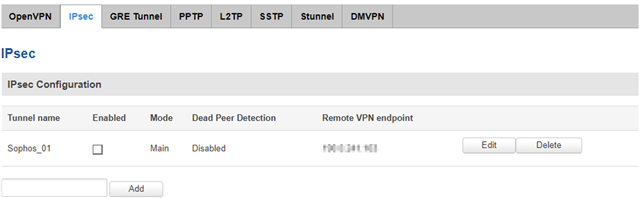
Check status of the tunnel
-
Teltonik
On the router
Go to Services -> CLI
Username: root
Password: your router's Admin Password
Once logged in, put in ipsec status and hit Enter
You should see a tunnel formed as in the example below

-
Sophos
You should see a green status light under VPN - IPsec connections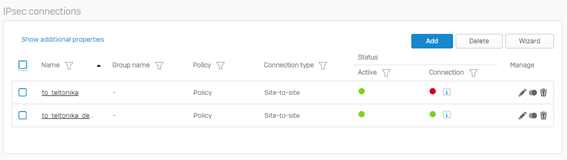
Updated Disclaimer
[edited by: Erick Jan at 1:20 PM (GMT -7) on 17 Apr 2023]
